Showing posts with label Vanilla. Show all posts

Wednesday, April 16, 2014

Coconut & Vanilla Rice Pudding

For the past week or so, I have had a craving for rice pudding. Since a little girl, I've always loved rice pudding. I don't know what it is, but it is so different from most desserts I usually have my eye on. Additionally, it can be easy to customize with your own favorite flavors. After this batch, I am curious to try swapping out the coconut milk for almond milk and seeing how that goes. Don't worry, I will make sure to keep you posted.


To get started you will need the following for about 6 servings.

Ingredients
1 1/2 cups cold cooked white rice
1 1/2 cups coconut milk
2 cups milk
1/3 cup granulated sugar
1 vanilla bean
1/4 tsp salt


Scrape out the insides of the vanilla bean into a large sauce pot and toss in the remaining ingredients. Cook on medium-low heat at a simmer. Cook for 40-45 minutes until liquid is soaked up and mixture is creamy.


Remove into a serving dish and let rest at room temperature for at least 20 minutes before cooling in the refrigerator. Serve cold. I like to sprinkle a little cinnamon on top too! Enjoy!


Wednesday, September 25, 2013

Butternut Squash Risotto

Fall is officially here and there is no denying it. With that said, I might as well embrace the cooler temperatures, heartier meals and pumpkin everything. I received beautiful butternut squash from the crop share and decided to make a creamy and fluffy risotto. This dish is very hearty, so you can serve it alone with a side salad or alongside a simple grilled chicken. The mix of the butternut squash and vanilla adds warm and comforting flavor to this dish.


Recipe yields 6-8 servings (as a side dish)

Ingredients
4 cups vegetable broth
1 vanilla bean
3 cups butternut squash (about 1 medium butternut squash)
3 tbsp unsalted butter
1 medium yellow onion
1 1/2 cups arborio rice
1/2 cup dry white wine
1/2 cup grated Pecorino Romano cheese
1 tsp salt
1 tsp parsley

In a medium stock pot, add the vegetable broth. Cut open the vanilla bean and scrape the insides into the pot. Toss in the outside bean and bring the broth to a simmer.

Chop the butternut squash into 1" cubes. Add the squash to the pot and cook in the broth for 8-10 minutes, until the squash is tender. I like to keep the squash on the 'harder' side so it has a bite to it when added to the risotto. But if you prefer, you can cook it longer and it will be softer in the final dish. Once the squash has reached your preferred texture, remove from the pot with a slotted spoon and reserve on the side. Keep the heat on low, so the broth mixture stays warm.

In a large skillet, melt 2 tablespoons of butter and add the chopped onion. Cook on medium low heat so the onion becomes tender without browning. Add the rice and coat in the butter. Add the white wine and continuously stir the rice until the wine is absorbed. About 1/2 cup at a time, transfer the broth into the skillet and stir into the rice. Continue this process, waiting to add more broth until the current portion has been soaked up by the rice. Keep on stirring until all the broth has been removed from the pot and has been soaked into the rice. The rice should now be plump and creamy. (*Note - remove the outer vanilla bean from the broth, DO NOT mix it into the rice!)

Cut the heat on the skillet and add the remaining butter, cheese and salt. Stir to incorporate throughout the rice. Add the reserved, cooked butternut squash and fold into the mixture. Remove to a serving dish and top with chopped parsley. Serve on its own or alongside a simple main dish. Enjoy!

Sunday, October 14, 2012

Number 100!

Today's post marks my 100th post since starting my blog only four months ago. I cannot believe how much support and encouragement I have received. Thank you to all my readers!

In honor of my 100th post, today's post features simple vanilla cake with chocolate buttercream filling and whipped cream frosting with sprinkles. Perfect for any celebration!


Recipe yields 1 2-layer cake

Ingredients
Cake:
5 large egg whites
3/4 cup whole milk
2 1/4 tsp vanilla extract
2 3/4 cups cake flour, sifted
1 3/4 cups sugar
1 tbsp + 1 tsp baking powder
3/4 tsp salt
12 tbsp unsalted butter


Whipped Cream Frosting:
3 cups heavy cream
1 1/2 cups confectioners' sugar

Chocolate Buttercream Filling:
1 cup unsalted butter
2 cups confectioners' sugar
1/2 cup cocoa powder
1 tsp almond extract
2 tbsp heavy cream

Sprinkles, for decoration


Preheat the oven to 350 degrees. Prepare two round 8" pans by coating with butter and flour and lining with parchment paper. Set aside. In a small bowl, whisk together egg whites, 1/4 cup milk, and vanilla extract. Whisk until light and airy.


In the bowl of a stand mixer or a large mixing bowl, combine flour, sugar, baking powder and salt.


Add softened butter and the remaining milk to the dry ingredients and mix using an electric mixer.


Gradually pour the egg mixture into the other ingredients, continuing to mix in between each addition. Divide the batter in half and pour into the prepared pans.


Place in the oven and bake for 22-25 minutes. Check cake with a toothpick, if it comes out clean you are good to go. Remove cakes from oven and let cool in the pans for 10 minutes. Remove from pans and place on a wire rack to finish cooling completely.


While the cakes are baking and cooling, you can prepare you filling and frosting. Lets do the filling first. In a medium bowl beat butter with an electric mixer until smooth. You want the consistency to be ice cream like.


Add sugar and cocoa powder and beat until it has been completely incorporated with the butter.


Add the almond extract and heavy cream and continue to beat for 3 minutes. If your frosting isn't the consistency you desire, you can add more sugar to make it stiff or more cream to thin it out. Remember to add a little bit at a time when you are trying to get to where you want.


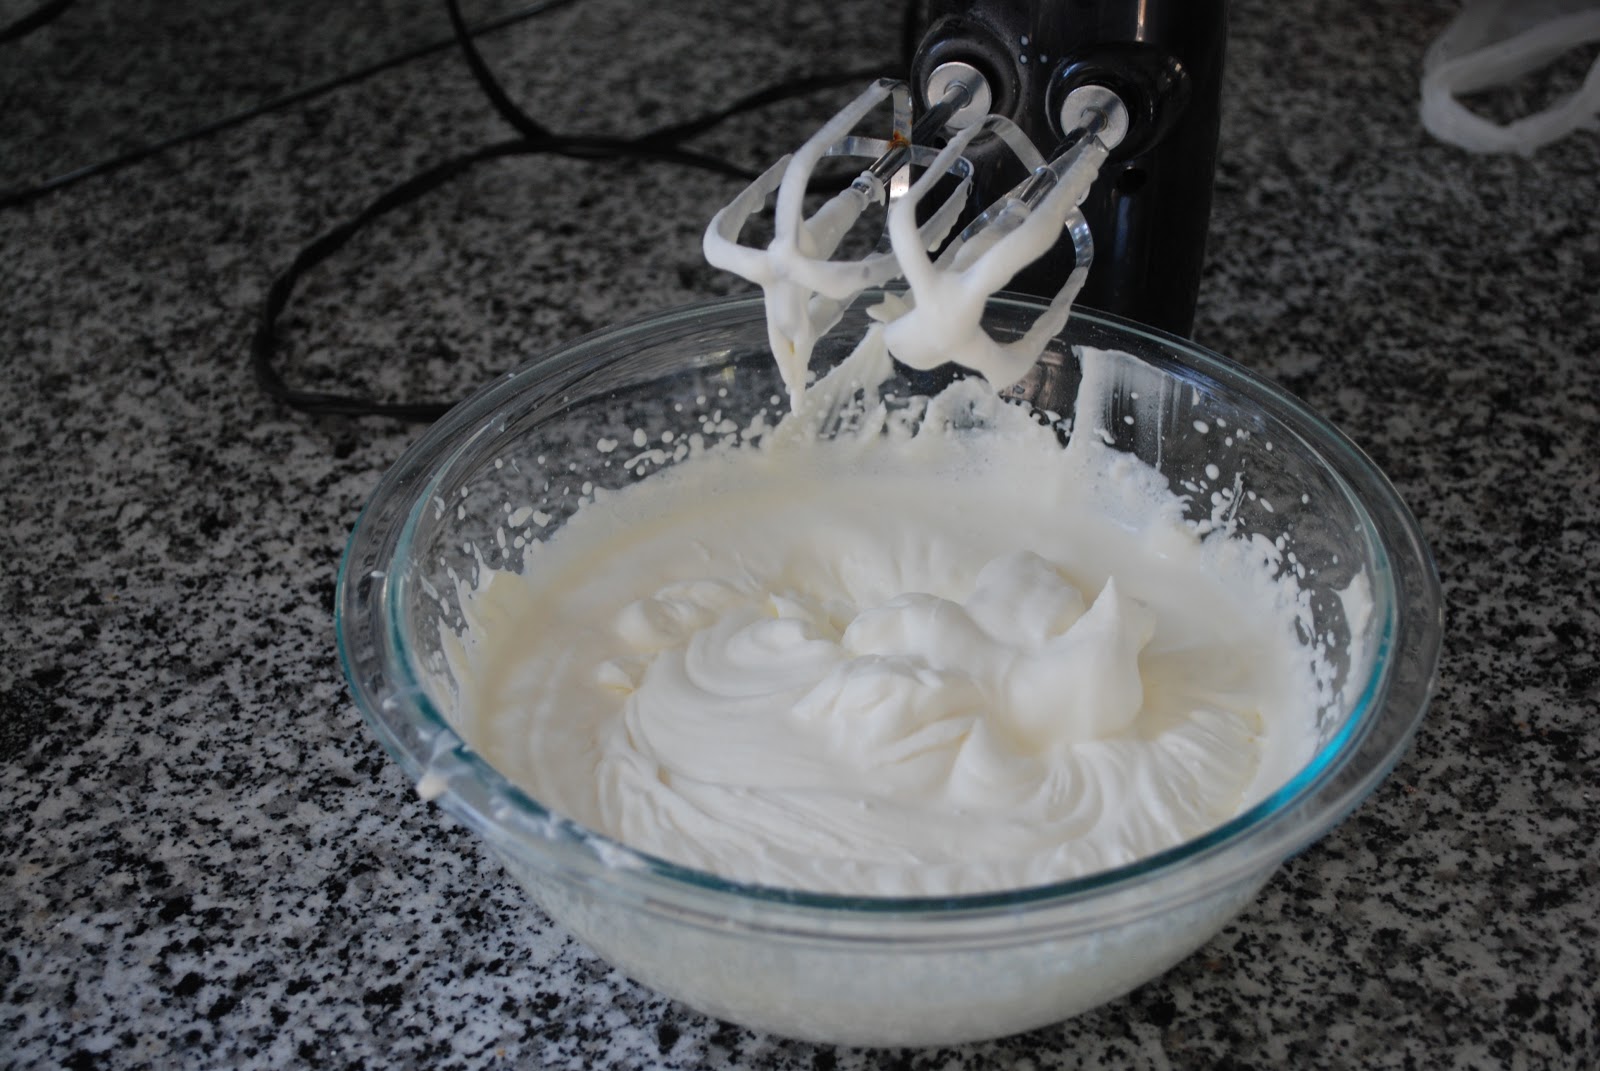
For the frosting, add heavy cream and sugar to a bowl. Beat on high speed until cream begins to thicken and forms stiff peaks on the mixers.


Once the cakes have cooled completely it is time to build our cake. Coat the top of one cake with the chocolate butter cream filling.


Top the edges of the second cake with the chocolate filling and then place it on top of other cake making sure both frosted sides match up.


Now cover the entire cake with the whipped cream frosting. I find it easiest to apply it roughly at first and then smooth it all out with a rubber or offset spatula.


Next I chose to cover the frosting with sprinkles, but that was more for a festive look and is totally optional.


Celebrate your special day (whether it is a blog milestone or just the first day of your favorite month!) Serve and enjoy!